Theme Layout

[Rightsidebar]

Boxed or Wide or Framed

[Boxed]

Theme Translation

Display Featured Slider

No

Featured Slider Styles

Display Grid Slider

No

Grid Slider Styles

Display Trending Posts

No

Display Author Bio

No

Display Instagram Footer

Powered by Blogger.
Showing posts with label DIY. Show all posts

Monday, December 15, 2014

Rustic Display Holder

Rustic Display Holder


A few weeks after moving into our new house, we stopped by our old neighbor's house to ask them if they planned to use the pallet sitting out on their driveway (it had been sitting there for months and I was constantly keeping my eye on it). Luckily for us me, they handed it over gladly and said there were plenty more in the backyard if we wanted them. Um? Yah!!

However, we haven't gone back to get more quite yet because my garage is still filled with everything else left to unpack. Besides, I hadn't even decided, at that point, what I was going to do with the one we had.

Wall Shelf.
Wine Rack.
Herb Garden Shelf.
Raised Pallet Garden.

The list goes on; I even have a Pinterest board dedicated to pallets alone. You should totally check it out. Anywho, I finally decided what I would do with the first pallet: garage organizer to store left over wood from previous projects, lawn care equipment and the like of such things. To create that we had to remove a board and decided to remove the one that was cracked and broken. I immediately knew what I wanted to create using that broken piece of wood.


During the holidays, I plan to use my display holder to hang our stockings and afterwards I will move the holder into our closet for my necklaces. I am enjoying the look and style of our holder. I also created a smaller version with three knobs that I will be offering on my etsy shop soon (stay updated to know when to grab it!) As for now, enjoy the rest of the pictures.


How do you display your stockings?
Do you stalk your neighbors trash?
Are you a DIYer or do you prefer to purchase?


Read the rest of the story »
stormieariel
2 Comments

Friday, October 31, 2014

Lost Files

Lost Files


In honor of our first home with a few days left before our move, I figured I would share undocumented projects that were near complete. 

I showed sneak peaks of our coat closet project:


And I think I mentioned the closet remodel for the second bedroom as well. Let's start with the secondary closet.

Our remodel started due to necessity. The wire shelf crashed because of the weight of things we needed in that closet. We didn't remodel right away, we rigged it and were careful with it. However, our niece was gonna move in and would need to use the closet. We rushed and completed the project in two days. We always planned to add the finishing touches to make the shoe shelf look more built in instead of forced in but after my niece moved out, my grandmother moved in.

This is the only picture from the remodel. Bad blogger.

Still very functional and the new owners can take out the shoe shelf if they want to add another rod.

The coat closet wasn't a necessity, more of a want.

I hate those wire shelving.

Anthony and I would just throw our jackets and belts on the dining chairs. The pile kept growing but it's just a hassle to take a hanger out and put the jacket on a hanger and hang it. I thought of creating hooks instead of a rod and looked to Pinterest. I saw many people had already created it in their own homes and it made me that more excited to try it. So we did! The only thing we didn't get to do was add shelving and paint the walls. However, the coat closet still came out beautiful and functional:


And that's the last of the house projects for our first home. I am sad to say bye but I'm excited for what is ahead!

Stayed tuned for an announcement!!


Linking up with:

http://tatertotsandjello.com/2014/10/link-party-palooza-giveaway-home-made-collection.html#more-65442
Read the rest of the story »
stormieariel
0 Comments

Thursday, October 23, 2014

Furniture Building

Furniture Building


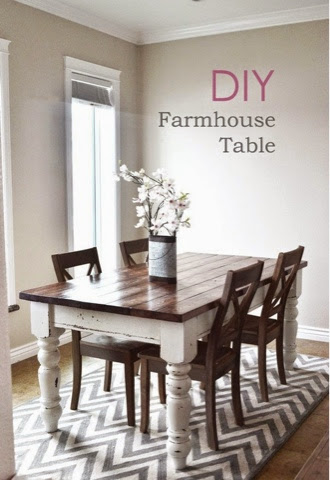
So I've been thinking like ALOT about making a dining table. The more I think about it, the more I love the idea!! I have been scanning my previous pins on Pinterest for inspiration:

http://houseandhome.com/design/photo-gallery-farmhouse-style?page=0

http://ana-white.com/2013/05/plans/husky-farmhouse-table


My ultimate inspiration came down to this one:

http://www.rivieramaison.com/page/42/Home.html

I love the curvy legs, kinda reminds me of a french provincial dresser. Gosh, what I would do to have one of those in my bedroom. Anywho, I don't think I would paint the bottom white, I would keep it all the same wood tone: dark walnut. I am even thinking of refinishing the silver chest and end table to dark walnut. The coffee table is already that stain color.

So, I have been so caught up in my vision I even hand drew my version (shows how much thought I have really put into it):


And guess what!

Anthony is fully on board!! First things first, we move into the new house; buy all the tools we need that we don't already have. Then, we will also need to order table legs:

http://www.osbornewood.com/1190.cfm


Since this is our first time building furniture, I am not confident that we could create those gorgeous curves I love which is why we are purchasing the legs. The legs will also match the silver chest, end table and coffee table in the living room which will help keep consistency. However, everything else will be handmade.  

I am so excited to start this project with my hubby!! Hopefully we survive and a beautiful piece comes out! Stay posted for updates on our move and furniture building process.

P.S. Depending on how well this project turns out, we may also build our formal dining room table as well.
Read the rest of the story »
stormieariel
0 Comments

Saturday, October 11, 2014

Our Closet Story

Our Closet Story


When we bought our house a little over two years ago, our master bedroom closet wasn't what it is now. I have shown you a snippet a few months ago when showing the master bedroom and mentioned I needed to do a post for our closet separately.

Well that day has finally came. 

When we purchased our house, there was a big gaping hole where a closet would be. There wasn't any shelving, rods, doors, nada. Just open space.

I imagine the closet looked like this once upon a time:


This picture is from a house a few doors down that is the EXACT same floor plan. So our closet had a door but I'm glad the previous owners made the decision to remove those hideous doors in our house.

Anywho, when moving in I had a clean slate to design a closet that would work for me. Most people jump to Pinterest for inspiration and most of the time, I am one of those people. But not this time, I went for function. I needed shelving for my shoes because let's be honest, I have too many. The other thing I needed in our closet was wood rods. I cannot stand the wire shelving stuff for closets. I also have way too many clothes that those things rip out the wall. (No joke, we had to remodel the coat closet and secondary bedroom closet because of this).

So I gave measurements to my father in law and a visual explanation of what I wanted to do. The next weekend, they show up with a floor to ceiling shoe shelf my grandfather in law built and installed my new shelving unit. Than they went to Home Depot to buy two wood rods and installed those. And that was that. I had a custom made closet.


The next step was to install doors. Pinterest helped with inspiration. I wanted bifold doors like these:
http://www.apartmenttherapy.com/closet-door-cou-106501

I also thought of a sliding barn door but decided to eventually install sliding doors withOUT mirrors like these:

All in all, we will not be installing doors. I plan to leave our closet open and let new owners decide what they want to do. I don't have an actual step by step tutorial for our custom closet as my in-laws did most of the work. Maybe one day, I can actual watch them and give a tutorial but no promises!

Have you had to remodel your closet? How did you find inspiration?
Read the rest of the story »
stormieariel
0 Comments

Sunday, September 28, 2014

DIY Fall Wreath

DIY Fall Wreath


Last Spring, I created my own Spring wreath for half the price of others listed. I knew I had to create a Fall wreath on my own as well. I was in love with quite a few wreath inspirations that cost $45+ and was determined to cut that price in half for my DIY version.

I gathered my supplies from Garden Ridge which is now known as at home.


I already had the sunflowers and glue gun. I purchased the wreath, harvest bunch and burlap ribbon for about $15. #winning

I glued the flowers and ribbon on the exact same way I did for the DIY Spring Wreath. I also followed this tutorial to create the bow. It was super easy to follow and took less than 10 minutes.


In total, I completed this project in less than an hour. I may add a little something more down the road but as of now it couldn't be anymore perfect.
Read the rest of the story »
stormieariel
1 Comments

Monday, March 31, 2014

Glamorous on a Budget

Glamorous on a Budget


Do ya'll remember about a month ago, I shared my master bedroom and the game plan with you all. I know I initially told ya'll I wanted to find a new home for our current bed set first but we decided to move something up on the list.

We installed the chandelier!!!

EHHHH!!! (That is my happy squeal)


Let's rewind a bit. When we bought our house a year and a half ago, the bedroom looked like this:

Notice the light fixture.
I was determined to turn our bedroom into a romantic getaway so we painted the walls Red Delicious by Glidden but color matched it to the brand America's Finest.


I am not sure what feel the room was giving off but it wasn't really romantic therefore I came up with a game plan to create a rustic glam style with romantic thrown in. The first thing I found for my newly inspired plan was the chandelier. It was listed on Craigslist for twenty dollars so I had to snag it up. The poor thing has been sitting in our garage for months now so we decided to finally install it. At least, my husband and father-in-law installed it while I admired it's beauty.


This simple fixture update has transformed my room and I am in love. It feels so glamorous.

G-L-A-M-O-R-OUS (anybody else remember that song?)

Seriously, the room feels so elegant and I think the room is finally heading in the direction I want it to go. Lets get one more look of the before and after.


Do you have the notorious "boob" light in your bedroom? Would you put a chandelier in your master bedroom or do you prefer chandeliers in the dining area?

I am sharing this post at Remodelaholic.

Read the rest of the story »
stormieariel
1 Comments

Thursday, March 20, 2014

DIY Spring Wreath

DIY Spring Wreath


Do you ever find yourself dreaming about the perfect spring wreath but you either can't find it or it's out of your budget? Yeah, me too!! So I decided to take things into my own hands and create the perfect budget friendly spring wreath.


I have been admiring Spring wreaths since summer and couldn't wait to get my hands on one. The wreath I have been gawking over is one I saw on Instagram.


Isn't it beautiful!! I mean who wouldn't admire it!

I bought my supplies from Hobby Lobby.
Hydrangea Stems (two white, one purple; I couldn't find the ones I used so the link is one similar to it)

The other supplies I already had on hand.
Hot Glue Gun with Glue Sticks
Small Paint Brush

I gathered my supplies together.

I painted the letter two weeks ago when I first bought my supplies. It just took me until yesterday to finally sit down and complete it.

Before beginning the second time around, I cut the hydrangea stems into smaller bunches using pliers. 

Originally, I hot glued the letter before the small bunches but decided to take it off and put it on last about half way through. I also hot glued the flowers two different ways. I started off putting the hot glue on the bunches than attaching to the wreath.


About half way through, I realized that was kinda tricky to quickly put it where I wanted it without the glue drying first. So, I did the last half by placing the flowers where I wanted them first than applying the hot glue. The second way was much easier and helped me decide for sure if I liked the arrangment. Once, I was done I decided where I wanted the letter to be and applied hot glue where needed.

In total, this project took me less than an hour to complete and I am so in love with my spring wreath!!


Price Break Down:
Hydrangea Stems - on sale for $5.99 x 3
Wreath - $2.99
Wooden Letter - $2.49
Paint - $0.77
Total - about $26

I saw one similar to mine on Etsy for $50 so I am completely satisfied that I was able to spend half the price.

Would you spend the $50 or try to DIY? What are you dreaming for this Spring season? 


I am sharing this post with Raising Mighty Arrows.

Read the rest of the story »
stormieariel
0 Comments

Monday, March 10, 2014

DIY Bath Wall Tile

DIY Bath Wall Tile


When we first bought our house, I knew immediately I wanted to change out the tile in the restroom. However, we were planning to hold it off for as long as possible since it wasn't a necessity. Shortly, after moving in we noticed a certain spot on the carpet in our bedroom would get wet after the shower was used.

We initially thought there was something wrong with the plumbing but that wasn't the problem. The grout was so worn out from the bath wall tile that the water was leaking through the wall into our bedroom. Therefore, we needed to replace the wall tile.

We started off with this as a recap.


My brother-in-law and husband replaced the drywall with backer board and also added insulation on the window wall. They than both started adding the new tile which I am very pleased with. However, we never got finished with it and sadly it has been sitting that way for over a year. We did apply clear caulking which I think was a mistake and never touched up the paint.


Sorry about the quality and darkness of these pictures.
There are two tiles that I do want to replace on the shower wall whenever we get around to matching the floor tile. One sticks out and the other wasn't cut properly for the facet to fit on the correct way.

After replacing the floor tile, I would like to
  • Add white wainscoting half way up the wall
  • Replace baseboards
  • Paint the upper half a light blue color
  • Replace the current mirror with a larger one
  • Spray paint the light fixture
  • Replace faucet fixtures
  • Remove popcorn ceiling
  • Remove cabinet above the toilet and use for our laundry nook
  • Install floating shelves above the toilet
  • Paint the cabinet with another white color and add hardware
  • Replace both doors
I am hoping to have the restroom completed before the end of the year. All the projects will be DIY except replacing the floor tile and baseboards. Once that is complete, I know everything else will be complete quickly.

How long have you left a DIY project unfinished? Do you plan on remodeling your restroom?

I am sharing this post with Remodelacholic.
Read the rest of the story »
stormieariel
0 Comments

Thursday, March 6, 2014

DIY Jute Wrapped Vase

DIY Jute Wrapped Vase


I am sharing this post with Remodelacholic
I made a trip to my local Goodwill earlier this week (it's becoming a weekly affair), in search of a lamp that I still haven't found. However, I did find this little blue guy for like 69 cents I think.


When I originally saw him I thought he would fit perfectly in the restroom somehow since blue is in the color palette. Once I got home, I decided to try him in the entry way; the color palette is gray and yellow.


Although, there isn't much yellow represented yet. I'm kind of at a lost of where to begin with this small area. 

I normally stick with the matchy matchy but I have been wanting to break out my comfort zone and add random pops of color so this little guy was the perfect subtle pop. I just felt like I wanted to dress him up a bit. 

I have noticed a lot of glass figurines have twine wrapped around the neck of the vases. So, I decided to try it with him. 

I got little blue ready with some extra twine I had laying around.


I began wrapping first to decide whether I would love it or hate it. If I loved it, I was gonna hot glue the twine to blue.


I tied the twine in the back and decided I didn't even have to hot glue it. I am free to remove it whenever I want but as for now I will keep the twine wrapped around little blue's neck.


I think I still need some more rearranging here to create a layout I like. I finally like the layering on the left but feel the right side needs more TLC. Maybe I will add some books (which is another idea I have played around with on my end table). 

How would you decorate this space? Are you a matchy matchy or mix & match type of gal? Are you digging the twine neck on vases?

I am sharing this post at Raising Mighty Arrows.
Read the rest of the story »
stormieariel
0 Comments

Monday, March 3, 2014

Project Update: Reclaimed Wood Sign

Project Update: Reclaimed Wood Sign


Remember that sneak peek I gave y'all in this post?


Well the project didn't turn out too good. I already messed up the wood board once and was on my way to remaking it when I gave the sneak peek.

I was painting layers upon layers of primer to cover up the old writing from my first attempt. I was so impatient with the drying process that I thought I had a fantastic idea. 

I would blow dry the wood in between coats so I can complete the project sooner. 

Well..

That didn't turn out too well, the paint felt too thick from the numerous coats of paint and was sticky. When it came time for me to write on the board it was impossible. Somehow the marker became dry because of the sticky paint job. So I messed the board up for the second time (notice where the l and w connect).


I had other ideas of how to fix it for a third time, I thought of using the back side and started off with this:


It looks decent however you can still see the first attempt of my writing through the coats of paint. Than I thought about stripping the board but decided I would just dump the board and start fresh with another piece of scrap wood from our old fence.


Hopefully, I will have patience this time around and I can finally have this project completed. I am aiming for something similar to this:

Source?
Eventually, I want to hang it over our bed with a picture from our wedding with our first kiss. I received my inspiration from Jefferson and Alyssa Bethke's bedroom.


Jefferson built that headboard himself!

How do you handle messing up a DIY project? Do you completely give up or try again? Would you try to salvage this piece of wood?

I am sharing this post with A Wise Woman Builds Her Home.
Read the rest of the story »
stormieariel
0 Comments

Thursday, February 27, 2014

Pinspiration: DIY Side Yard Lounge

Pinspiration: DIY Side Yard Lounge


Since we have bought our house, I love entertaining. We have family over quite often but being that our house is small, it gets crowded REALLY easily. Therefore, I have a dream; I want to create a hang out spot in our side yard with plenty of seating.
This is what I am working with
I am not sure how long that deck has been there and the trash? Sadly, that has been spread out over the back yard for over six months. I took the first step with this project, cleaning up the backyard last weekend. Hopefully this weekend we will complete the next step: ripping up the deck.

I have some pictures on Pinterest that are serving as my inspiration. Here is a peek:

http://www.apartmenttherapy.com/debolts-backyard-small-cool-ou-154415

This is the very first picture I found when searching for inspiration. I love how cozy it looks with the lights and the mix matching chairs but still looks uniformed. I think I also saw a similar yard with a dart board on the wall which I would love to add to our side yard as well. I also love how the stone is in the ground and I look forward to creating that with our side yard instead of a deck. The only thing I want different is a larger table. Something like this:

Source?

I love how informal the table is and how much room it has. Our "dining" space in the house is tiny. We have a four seated round breakfast table. If we had a large farmhouse table like the one pictured above, I could host many more dinners with family and friends.

We are hoping to have this project completed before the end of summer. I was originally aiming for end of Spring but with how long I take making progress it wouldn't be realistic. I hope you stick around for updates!

Do you like entertaining? Do you ever wish you could just snap your fingers and your project will be completed within seconds?

I am sharing this post with A Wise Woman Builds Her Home, Raising Mighty Arrows, Made in a Day
Read the rest of the story »
stormieariel
0 Comments

Saturday, February 22, 2014

Quick Frame Makeover

Quick Frame Makeover


Remember on this post, I said I was going to try gold leaf on this frame?

Well I did. Kinda. I used Liquid Leaf in gold because that's all I could find at the time. I am not sure if it is the same thing as Gold Leaf since this is my first time using any kind of Leaf. I bought mine at Wal Mart, it was more than I though it would be but than again I was originally planning the Gold Leaf. It was almost five dollars for this little bottle.
The bottle is 0.75 fl. oz.

This project took less than five minutes to complete however I let the frame dry overnight.

I first gathered all my supplies and unassembled (is that a word?) the frame. My supplies were the frame, the liquid leaf, a paint opener (to open the frame), a small paint brush and a board to lay the frame on while I paint it. I would suggest a type of mask because liquid leaf has a very strong smell similar to spray paint and I painted while indoors since it was during the night.


I only had to apply one coat because the liquid comes out pretty thick even with applying small dabs at a time. I think with the frame being painted a type of gold before also helped having to use one coat.

And here is the finished product

For the most part, it looks the same. The biggest difference is there is now a shine to it. The previous paint job looked really dull so I am satisfied with this quick and easy makeover. I am anxious to try out liquid leaf on other things now!

Is there a difference between liquid leaf and regular gold leaf? Are you a fan of liquid leaf? What projects have you completed using liquid leaf?


I am sharing this post at nancherrow, RemodelaholicSerenity Now, A Wise Woman Builds Her Home, and Made in a Day.
Read the rest of the story »
stormieariel
0 Comments

Follow @stormieariel